Maple-Sunbutter Cookies {gluten-free, nut-free, vegan}

Maple-Sunbutter Cookies {gluten-free,vegan}

Winter Daybreak

MAPLE-SUNBUTTER COOKIES {gluten-free, nut-free, vegan}

Just to push all those savory-salty-sweet buttons like a good peanut butter cookie! I’ve tried this recipe with all sorts of gluten free flours, oils, and sweeteners.  However, maple syrup is my favorite!  The choice of oil seems to make less of a difference.  I give a couple of options below.  If you opt for coconut oil, be sure it is melted.  Like butter, it solidifies at cooler temps and will seize up into little chunks when it meets a cold substance (like refrigerated maple syrup!).

Dry Ingredients:
1 cup sorghum flour (or brown rice flour)
1/2 teaspoon baking soda
1/2 heaping teaspoon kosher salt
1/4 teaspoon xanthan gum

Wet Ingredients:
1/2 cup sunflower seed butter
1/2 cup pure maple syrup (I used grade A, but I bet grade B would be even better)
3 tablespoons unrefined coconut oil (melted), olive oil, or organic canola oil
1 teaspoon vanilla

  • Preheat oven to 350 degrees F.  Line a sheet pan with parchment paper.
  • In a medium bowl, whisk together the dry ingredients.
  • In a large bowl, mix together the wet ingredients.  Add the dry mix to the wet mix and stir until evenly moistened.  Allow the dough to rest a minute or two.
  • Using a tablespoon, drop the dough onto the cookie sheet and give each mound a gentle press to barely flatten into disks.
  • Bake 9-11 minutes, depending on your cookie personality: soft vs crumbly.

Yield: About 1 dozen

Ethereal Cream Biscuits {gluten-free}

Our Saturday mornings are wonderfully the same around here: leisurely, relaxed. Well, except for getting up at 6:00 in the morning. Babies don’t seem to grasp the concept that weekends are made for sleeping in, but that’s quibbling, and certainly nothing multiple cups of coffee can’t fix. We lounge around in our pajamas, talking and sipping, while Cecil plays happily at our feet.

At some point the caffeine inevitably gets the better of us. Our cue to make breakfast.

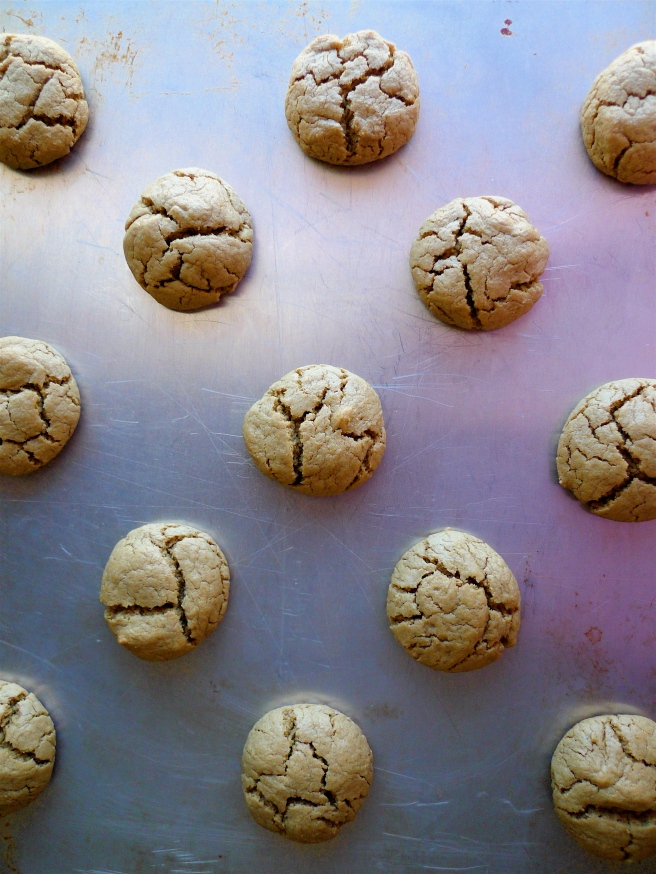
Saturday’s breakfast is nothing short of a feast. Brown-butter fried eggs with runny yolks and sriracha. Thick, crispy bacon. Skillet potatoes. Whatever fresh fruit might be lying around. And of course something bread-y, like a dutch baby pancake or banana bread, but more often than not, we whip up these meltingly tender and crumbly-edged cream biscuits.

This is a quick, one-bowl endeavor. Whilst the oven preheats to a scorching 425 F, whisk together the dry ingredients, a mere two minutes of work, and then proceed to pour what feels like an obscene amount of heavy cream over the top. You might blush. I always do. Don’t fret.

Now, take a fork – any old fork will do – and incorporate the cream into the flour until it becomes a moist, crumbly mass. I like to pinch off a small wad of dough and give it a little squeeze in the palm of my hand. If it crumbles, a splash more cream is in order.

At this point you’ll want to haphazardly dust a relatively clean work surface with rice flour. I’ve grown fond of using my silpat for rolling out dough, its nonstick qualities makes things so much easier. Scrape the dough into a heap on your dusted surface, press it into a cohesive mound, give it a few good kneads, and then begin to roll it out, aiming for a 3/4″ thick rectangle.

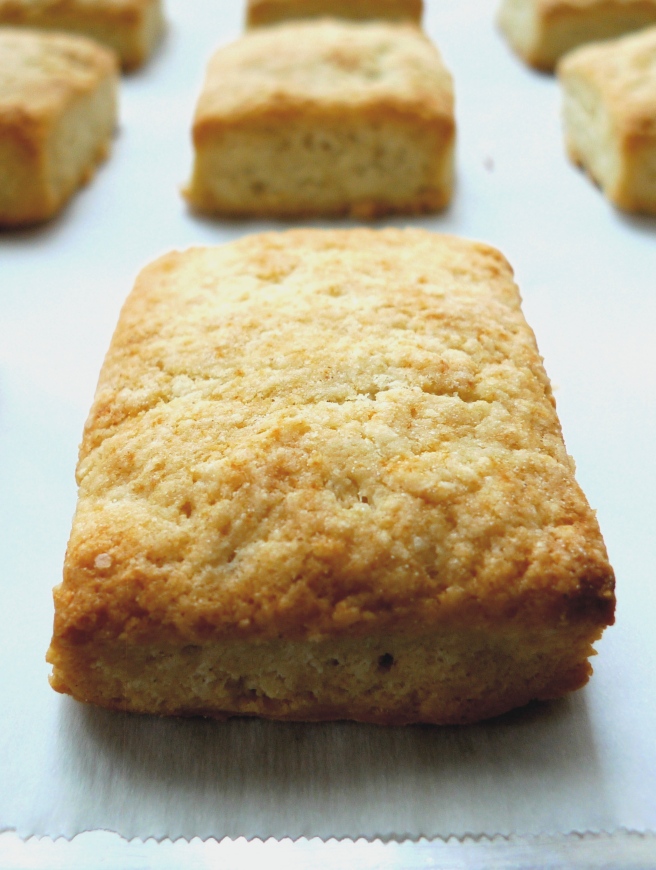
Now, just cut your biscuits into whatever shape you prefer. Sometimes I use a biscuit cutter for the traditional round affect, but it is more convenient to simply cut the whole slab into squares, no re-rolling, no waste.

Grab a cookie sheet, preferably with a heavy bottom. If you don’t have one, a regular cookie sheet will work fine, just be sure to move your oven rack up to the top third of the oven; these cook quickly at high heat and the biscuit bottoms are prone to burn if not attended to.

The final step might feel like gilding the lily, what with all that cream, but never mind such thoughts, go ahead and brush your biscuits with a little melted butter and get them in the oven quick.

In 15 minutes you’ll have, arguably, some of the best homemade biscuits you’ve ever eaten.

CREAM BISCUITS

Inspired by Marion Cunningham’s version in The Breakfast Book.

A few words on my choice of gluten-free flours. Trial and error has resulted in the persnickety list of ingredients and ratios below. The whole-grain base of brown rice and sorghum flours for their hearty, well-rounded flavors, a generous amount of cornstarch for extreme lightness, and tapioca flour to encourage browning and that desirable crumbly exterior.

These biscuits freeze remarkably well. Flash freeze the raw biscuits on a cookie sheet and then place in a freezer bag for storage. To heat them up, follow the same instructions below, 15 minutes at 425 F.

Lastly, if you’re not in the mood for biscuits, this recipe easily transforms into scones. Simply increase the sugar to 1/4 cup and add 1/2 – 3/4 cup of your preferred medley of chopped, dried fruit to the dry mix (raisins, apricots, figs, etc.), continue with the recipe as written, but pat the dough into a circle 10″ round, brush with butter, sprinkle with a couple of tablespoons of sugar and cut into 12 wedges. Bake as outlined below.

Dry Ingredients:
3/4 cup brown rice flour
3/4 cup corn starch
1/4 cup sorghum flour (or more brown rice flour)
1/4 cup tapioca flour
1 tablespoon gluten-free baking powder
2 teaspoons sugar
1 scant teaspoon xanthan gum (I use Bob’s Red Mill)
1 teaspoon kosher salt

Wet Ingredients:
1 – 1 1/2 cups of heavy cream
2 tablespoons melted butter, for brushing

  • Preheat oven to 425 F.
  • In a large bowl, whisk together the dry ingredients.
  • Pour 1 cup of cream over the dry mix, reserving the remaining 1/2 cup of cream. Using a fork, fold the cream into the dry mix. If you find the mix is still dry and crumbly, add a little more cream, stir, repeat if necessary. The flour mix should be just moistened, but not sodden.
  • Scrape the dough out onto a lightly rice-floured work surface. With your hands press the loose dough pieces together and knead a few times, sprinkle lightly with rice flour if things get too sticky.  With a floured rolling-pin, roll the dough into a 3/4″ thick rectangle. Cut into 12 squares, place on a baking sheet 1/2″ apart.
  • Brush the tops with melted butter.
  • Bake 15 minutes until lightly browned

(Makes 12 biscuits)

Lemon Chia Seed Cake {gluten-free,vegan}

Lemon Chia Seed Bread {gluten-free, vegan}

I thought I’d share this new gluten-free, vegan quick bread I’ve been making a lot lately. Consider it a twist on the lemon poppy-seed sort. It swings a little more to the cake end of the spectrum than my other quick breads, but in a good way, with a light, springy texture and a tad extra sweetness. The lemon is subtle, just a teaspoon or so of zest. And chia seeds, while an excellent visual substitute for poppy seeds, play a structural role as an egg-replacer, too.

P1060822

A Super Seed
Here are a few cool facts: chia seeds boast more calcium ounce-for-ounce than a glass of milk (great news for the dairy-free!), are a concentrated source of omega-3 and omega-6 fatty acids, and provide complete protein all on their own (Vegans? Vegetarians? That’s for you.). Poppy seeds are cool and all, but chia seeds win my vote any day for their super-food bragging rights.

To read more about this super-seed and its fascinating history, check out Sarah’s post at My New Roots.

I’ve mentioned already that chia seeds stand in for the binding power of eggs in this recipe, but it is sparkling water that makes up for eggs’ leavening abilities. I find I am using sparkling water more often in my baking to give these arguably heavy gluten-free flours some lift and lightness.

Lemon Chia Seed Bread {gluten-free, vegan}

Also, I like to dust the pan with sugar instead of flour, which creates a wonderfully crunchy sugar crust around the edges, especially at either end.

LEMON CHIA SEED CAKE

Dry Ingredients:
1-2 tablespoons white sugar (for dusting the pan)
2/3 cup brown rice flour
1/3 cup millet flour
1/3 cup potato starch
1/4 cup tapioca starch
1 1/2 teaspoons baking powder
1/2 teaspoon xanthan gum (I used Bob’s Red Mill)
1/2 teaspoon Kosher salt
1 teaspoon lemon zest (about half of a lemon)

Wet Ingredients:
1 tablespoon chia seeds
3 tablespoons hot water
2 tablespoons unrefined coconut oil
3 tablespoons neutral/mild flavored oil like canola
3/4 cup turbinado sugar
3/4 teaspoon pure almond extract
3/4 teaspoon pure vanilla extract
2 teaspoons fresh lemon juice (about half of a lemon)
1/2 cup plus 2 tablespoons sparkling mineral water, like Perrier (sea level bakers may need closer to 3/4 cup)

  • Preheat oven to 350 degrees F. Oil a 9×5 loaf pan and sprinkle with 1-2 tablespoons of white sugar, turn the pan to coat, and tap to remove any excess sugar.
  • In a small bowl, whisk together the chia seeds and hot water. Set aside for 10 minutes to thicken.
  • In a medium bowl, whisk together the dry ingredients, beginning with the brown rice flour through the salt. Add the lemon zest to the mix with your fingers so as to break up any clumps of zest.
  • In the bowl of a stand mixer, beat the coconut oil, canola oil, and turbinado sugar. Add the chia seed gel and mix to incorporate. Add the almond and vanilla extract, along with the lemon juice, mix until fully incorporated. Alternately, add the dry flour mix and sparkling mineral water until the batter is just blended.
  • Pour batter into prepared pan and bake 45-50 minutes until the center is set and a toothpick inserted into the bread comes out clean. Allow bread to cool in pan for 10 minutes. Then remove from pan and allow to cool fully on a rack.

Pomodori col Riso {gluten-free, vegan}


I was the happy recipient of two grocery bags full of homegrown tomatoes last weekend (thanks Erika!).  Talk about the perfect gift. Admittedly giddy, I went through and delicately handled each shapely orb, dividing them into little groups according to ripeness and day-dreaming about all the ways I could use them up.  There was one beautiful heirloom with dark burgundy and black stripes that begged to be eaten, so I sliced that one thick and ate it on the spot.

The four biggest, buxom beauties were set aside with this dish in mind.  I’ve been ogling the recipe at Rachel Eats for over a month, hoping to get my hands on a few particularly good tomatoes.
Rice-Stuffed Tomatoes {gluten-free, vegan}

Pomodori col Riso translated is literally Tomatoes with Rice.  No bells and whistles here.  Much like the name, the ingredient list is a minimalist’s dream: tomatoes, rice, olive oil, salt and pepper, and a few leaves of fresh basil. I t should come as no surprise that the preparation is equally straightforward.  Basically, empty the tomatoes of their pulp and juices, mix said pulp and juices with everything else, and then refill the tomatoes with the mix.  Indeed, a perfect example of Italian culinary brilliance and thrift. Nothing goes to waste.

I am over-simplifying the process a bit, because it is necessary to heed two other very important steps. We’ll call them “The Wait” and then “THE LONG WAIT”.  You see, once you’ve got your bowl of tomato pulp, rice, oil, and seasonings – a primordial soup if I’ve ever seen one – you must allow it to sit.  The rice will swell and soften, absorbing the flavors of each component.  Rachel recommends at least 45 minutes.  It is after this little wait that you stuff the tomatoes and then roast them in the oven.

Now comes the torturous final step, or “THE LONG WAIT”, whereby you allow those hot, intoxicating and shriveled mounds to rest…for hours…at least 2-3, or even over night.

In an effort to escape the aroma and avoid temptation until dinner, Cecil and I went for a long walk.

The Pomodori are traditionally served at room temperature, which we noted allows all that flavor to really sing. The rice was exceptionally creamy, so much so that Adam asked in a puzzled tone what cheese I had used. The answer was, of course, none in the least.

POMODORI COL RISO
Adapted from Rachel Eats

Now, I must confess, I went a little rogue in my choice of fresh herbs. I had a nice bunch of fresh thyme but no basil on hand and it seemed frivolous to run out for just basil. I reasoned that an Italian would more likely frown down upon wastefulness than swapping herbs. Besides, it is mid-September and where I live the leaves are already turning, Fall is in the air, and thyme just seemed more appropriate.

We served our stuffed tomatoes along side perfectly fried, runny-yolk eggs, fondly named Nick’s Eggs in our house, after our brother-in-law. I will have to post that recipe sometime.

Do pop over to Rachel’s post for her spirited and altogether charming description of the preparation process; it is a delightful read.

Ingredients:
8 fist-size ripe and flavorful tomatoes (I had 4 extra-large tomatoes)
salt
2 cloves of garlic, minced
10 or so tablespoons of arborio rice (or any risotto rice, I should think)
1/3 cup extra virgin olive oil, plus a glug
black pepper
2 sprigs of fresh thyme (or fresh basil), chopped

  • Using a paring knife, slice off tops of tomatoes and set aside.
  • Scrape out tomato pulp, seeds and juices into a medium-sized bowl, leaving enough flesh intact to provide structure. Sprinkle interior of each scraped tomato with a little salt and then place top down over a few folded paper towels to drain.
  • Break down the tomato pulp via a food mill, an immersion blender, or a pulse or two in the food processor.  You don’t need a smooth texture; you just need to smoosh any large chunks.
  • To the bowl of tomato pulp add the minced garlic, rice, olive oil, about 4 pinches of salt, a few generous grinds of fresh black pepper and thyme. Stir the mix, cover with a tea towel and allow to sit at room temperature for at least 45 minutes.
  • Preheat oven to 400 degrees F.  Oil a baking dish that will accommodate all of the tomatoes without being either too roomy or too snug.
  • Before stuffing the tomatoes, stir the mix one more time and taste, avoiding any of the still-crunchy rice. Adjust seasoning if necessary.
  • Fill tomato shells 3/4 full with tomato pulp and rice mixture and replace tomato tops. Place tomatoes in the oiled baking dish. Dollop any leftover stuffing around the tomatoes in the bottom of the dish.
  • Roast for 45 minutes, until the rice is tender.
  • Allow to cool 2-3 hours, at least.  Serve at room temp.

(Serves 4)

Old-Fashioned Chocolate Cake with Quinoa Flour {gluten-free, vegan}

It has been a very long while since I’ve posted anything here. Please excuse the dust. However, I have a wonderful reason for my time away…

Our sweet son, Cecil!

This time last year he was still growing in my belly. I was elated, engrossed, and understandably monomaniacal about it all. Hence, the reason for my absence around these parts.

Then, in early January, he arrived.  We’ve never known such love.

He’s almost eight months old now(!) and fantastic, such a delight. And this new role, the wonderful chaos of it all, has nearly become second nature. For me, that means there is time to not only make dessert, but occasionally take a photograph, as well.

So, what better way to celebrate and begin anew than with a cake?

This recipe has been a long time coming. I have been tweaking it for a couple of years, tinkering away with the combination of whole grain flours, the ratio of liquids, different sweeteners, etc. I think I finally have it dialed in.

First, I love this cake’s thrift and convenience. Since the ingredient list consists of pantry goods, you can make it on a whim, no dashing out to the store for some last-minute perishable. I like to think this is the kind of cake our great-grandmothers would have made, perhaps when times were lean, but there was still reason to celebrate.

You’ll find no butter, milk, or eggs, a rare feat for any cake. Instead we have just the right amount of vinegar, oil, and water, a wet slurry that when combined with a bit of baking soda creates some sort of miraculous leavening concoction. Aside from being vegan, the cake is gluten-free, too. I’d rather not dwell too long on what’s missing, though, because this is not a glass-is-half-empty kind of cake. It is, in a word, exemplary: moist, dense, super chocolaty, with a lovely crumb.

The use of quinoa flour adds an almost undetectable, nuanced compliment to the cocoa, not to mention a hefty nutritional boost. You just taste complexity. I’ve talked about this combination before: chocolate + quinoa flour.  It’s a real favorite of mine.

Please, do give it a try and let me know your thoughts. I think it might just become one of your favorite cakes, too.

Old-Fashioned Chocolate Cake with Quinoa Flour
Truth be told, we’ve been known to have a little sliver alongside our morning cup of joe…just an idea. Also, I offer a range for both the quantity of water and the baking soda. If you live at sea level you’ll likely need the higher range of each, or 1 cup of water and 1 teaspoon of baking soda. I live at an extremely high altitude so I almost always need less liquid and slightly less leavening. One last note, this batter, when immediately poured into your baking dish, is pretty thin and pourable. If you wait, the batter begins to thicken.

Dry mix:
1/2 c. quinoa flour
1/2 c. brown rice flour
1/3 c. potato starch
3 T. tapioca starch
1/3 c. cocoa powder
3/4 t. xanthan gum (a heaping 1/4 t. if using Bob’s Red Mill xanthan gum)
3/4 – 1 t. baking soda
1/2 t. salt

Wet mix:
1 c. turbinado sugar (or white sugar)
3/4 – 1 c. water
1/4 cup neutral-tasting oil like grape seed
1 T. apple cider vinegar (white vinegar works also)
1 1/2 t. GF real vanilla extract

  1. Preaheat your oven to 350 F.
  2. In a medium size bowl, whisk together the dry ingredients.
  3. In a larger bowl, whisk together the wet ingredients.  Let the wet mix sit for a moment to give the turbinado sugar a chance to dissolve. This is when I oil my pan.
  4. Add the dry mix to the wet mix and whisk until fully incorporated.
  5. Pour the batter into an 8″ round, oiled pan.
  6. Bake 25-35 minutes or until a toothpick comes out clean. Allow to cool for 10 minutes or so.