Blue Bird Days

img_2100

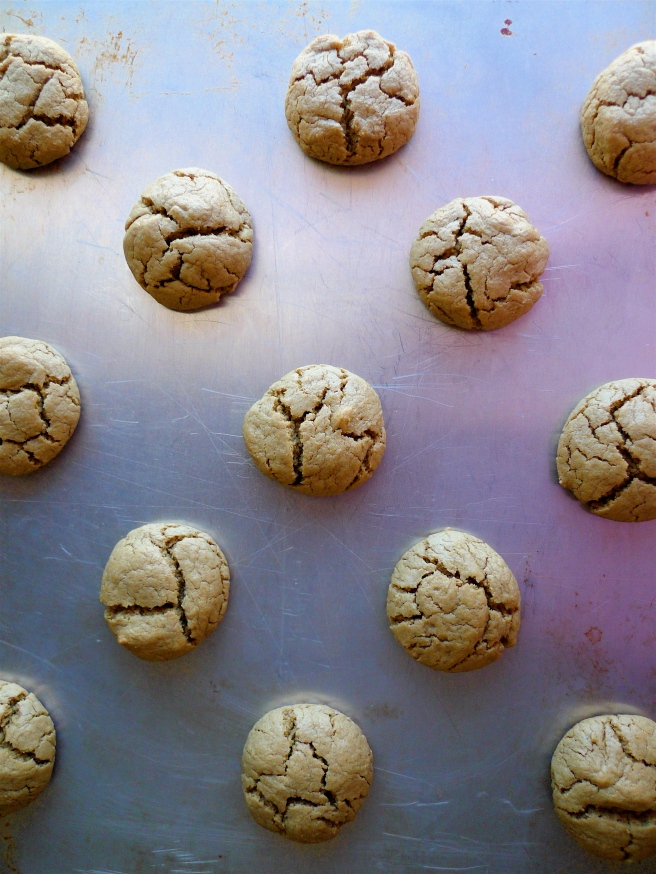
This is a little Early Spring menu. I always anticipate the change of seasons, and where we live March and April don’t typically feel very springy (although this year is quite the exception!). This is my remedy. Ostensibly springy foods just cozied up a bit.

SALMON WITH CRÈME FRAÎCHE AND HERBS {gluten-free}
We make this year round. It’s fast and delicious for very little effort, perfect for a weeknight! I always serve it over brown rice to sop up the sauce. THAT SAUCE. It’s the best part! As for sides, the asparagus recipe below would be nice for special occasions, but my favorite side is boiled frozen peas with a little olive oil and finely chopped fresh mint.

Also, not to be a pain… but do try to use crème fraîche. It can be pricey and I’m sorry.  I think you’ll forgive me after you try this. Sour cream will work in a pinch. The results will be slightly different.

Lastly, if you’re feeling really decadent, you can double the sauce. That’s just an unspoken, universal truth. In life you can always double the sauce.

1 pound salmon filet (approx)
2 teaspoons olive oil, divided
1/4 teaspoon kosher salt
1/8 teaspoon fresh cracked black pepper

1/2 cup creme fraiche
juice of 1 small lemon, approx 2 Tbs.
1 garlic clove, minced
2-3 tablespoons flat leaf parsley, chopped fine
2 tablespoons fresh mint, chopped fine
1 tablespoon shallots or fresh chives, minced
1/2 teaspoon dried dill (fresh would probably be awesome, but I always just use dried)
1/4 teaspoon kosher salt
pinch of black pepper

1. Preheat oven to 375* F

2. In a large baking dish that will more than accommodate the fish, lay a piece of parchment paper about twice as large as the baking dish (let the extra paper drape over the side). On the section of parchment that is sitting in the dish, drizzle 1 tsp. of olive oil.  Lay fish skin-side down on oiled parchment.  Drizzle fish with remaining 1 tsp. olive oil and season with salt and pepper to taste.

3. Prepare the creme fraiche sauce.  In a medium sized bowl mix the remaining 8 ingredients: creme fraiche through the pinch of pepper.

4. Pour sauce mixture over entire fish.  Fold the unused side of the parchment over the fish.  Fold the edges three times to create a parcel and seal thoroughly.  You’re steaming the fish in the parchment so its important that the edges stay sealed.

5. Bake approximately 15-20 minutes**, until parchment envelope puffs up and fish begins to flake.  Remove from oven and allow to cool 5-10 mins before opening parchment at table.

(Serves 4)

** Depending on the thickness of your salmon filet, it might need more time in the oven. I’d start checking around the 18 minute mark. I’ve had 1 1/4″ – 1 1/2″ filets require closer to 25 minutes.

ROASTED ASPARAGUS BUNDLES {gluten-free}
In the photo above I was tinkering around, testing different versions of this recipe.  I don’t like the other components to cover up the natural flavor of the asparagus, so I keep all the garnishes pretty light.

To make this dairy-free, simply omit the parmesan cheese shavings.  The other flavors are very pronounced and you won’t miss the cheese a bit.  The little touch of parsley and lemon zest on top add just enough flavor and color.

1 pound asparagus
6 slices prosciutto
1-2 T. olive oil
kosher salt and black pepper
parmesan cheese shavings, using a vegetable peeler
2-3 T. parsley, coarsely chopped
1 t. lemon zest

  1. Preheat oven to 375* F.
  2. Cut off the bottom third of each asparagus stalk.  Divide the stalks into 6 little piles (approx. 4 or 5 stalks per pile, depending on the size of your asparagus).  Wrap each pile of asparagus in 1 slice of prosciutto and place bundles with the prosciutto seam-side down on a baking sheet or sheet pan.  Repeat with remaining piles, leaving a little room between each bundle.
  3. Drizzle the bundles with olive oil, fresh ground pepper, and the tiniest pinch of salt (prosciutto and parmesan together are quite salty, so you need very little). Roast approximately 20-25 minutes, until the asparagus is tender and just beginning to brown.
  4. Before serving, lightly scatter with chopped parsley, a couple of parmesan shavings and a pinch of lemon zest over each bundle.

(Serves 6)

STRAWBERRY SHORTCAKES {gluten-free}
This is a great way to serve those first strawberries of the season that may not be the most ripe and flavorful, but they’re red and pretty and you just want them anyway. Also, I’m more of a cupcake-shortcake-gal as opposed to a biscuit-shortcake-gal, just my personal preference.

Strawberries:
1 lb. strawberries, hulled, sliced
1-2 tsp. orange zest (preferably organic)
juice of 1 orange
3-4 tablespoons sugar
1/4 teaspoon vanilla

In a medium-sized bowl mix together all ingredients. Taste & adjust. Macerate at room temperature, stirring occasionally, until shortcakes are ready.  Or prepare ahead of time and store in the fridge, but bring to room temp 30 minutes before serving.

Shortcakes:
1 1/2 cups flour (for GF use: 1 c. rice flour, 1/3 c. potato starch, 1/4 c. tapioca flour, 3/4 tsp. xanthan gum)
1 1/2 teaspoons baking powder
1/2 teaspoon salt
4 tablespoons butter, at room temp (for dairy-free use coconut oil)
3 tablespoons canola oil (or other neutral flavor cooking oil)
3/4 cup sugar
1 egg (or 2 for more of a denser sponge-cake)
3/4 teaspoon vanilla
3/4 cup sparkling water, like Perrier

barely-whipped cream, to serve (2 cups heavy whipping cream, 1-2 T. sugar, 1/2 tsp. vanilla, whisk until soft peaks form)

confectioner’s sugar, to serve

  1. Preheat oven to 350* F. Generously butter a 12 cup muffin pan.
  2. In a medium bowl whisk together flour, baking powder and salt.
  3. In the bowl of your mixer, beat together the butter, oil and sugar until light and fluffy, approx. 2 minutes.  Add the egg and then the vanilla.
  4. Alternately, and on low-speed, beat in the flour mix and sparkling water, until just blended. Divide batter between muffin cups. Bake 15 – 18 minutes, until tops are brown and cakes have set.  Test with a toothpick. Allow to cool a few minutes before removing from pan.
  5. To serve, slice each cake in half, horizontally. Spoon macerated strawberries and their juice over the bottom cake half, top with a big dollop of barely whipped cream, place the cake’s “hat” on top.  Dust with confectioner’s sugar.

(Makes 12 shortcakes)

Olive Oil and Maple Granola {gluten-free, vegan}

Olive Oil and Maple Granola {gluten-free, vegan}

Much like banana bread, I’ve never met a granola I didn’t like.  BUT.  If I had to pick only one…

Olive Oil + Maple Granola {gluten-free, vegan}

In this version, the more traditional ingredients like honey and a neutral-tasting oil or butter are swapped out for the dark, heady flavor of real maple syrup and the grassy notes and pleasant bitterness of olive oil.

Not only is this unexpected pairing of flavors complimentary, but it also creates a markedly unusual texture.  Whereas most granolas are pleasantly chewy this recipe is almost brittle, crumbling to pieces in your mouth.  I tend to hover over the hot heap right out of the oven, picking out the toasty coconut shards and eating them one-by-one.

OLIVE OIL & MAPLE GRANOLA
This recipe was created by Nakisia Davis, owner/founder of Early Bird Foods.  She was generous enough to share it eons ago with the good folks over at Food52 as part of their “Genius Recipes” column, a weekly post that’s been a real boon to anyone’s ongoing search for delicious food.

3 cups gluten-free old-fashioned rolled oats
1 cup raw pumpkin seeds, hulled
1 cup raw sunflower seeds, hulled
1 cup unsweetened coconut chips
1 1/4 cups raw pecans, whole or roughly chopped
3/4 cup real maple syrup
1/2 extra-virgin olive oil
1/2 cup packed light-brown sugar
1 teaspoon kosher salt

  • Preheat oven to 300 degrees F.  Line a rimmed sheet pan with parchment paper.
  • In a large bowl mix all ingredients together, stirring until everything is evenly moistened.
  • Spread granola mixture onto lined sheet pan and bake, stirring every 15 minutes, until toasty brown, approximately 45 minutes.
  • (Try to) cool completely before serving or storing.

Yield: 7 cups.

Maple-Sunbutter Cookies {gluten-free, nut-free, vegan}

Maple-Sunbutter Cookies {gluten-free,vegan}

Winter Daybreak

MAPLE-SUNBUTTER COOKIES {gluten-free, nut-free, vegan}

Just to push all those savory-salty-sweet buttons like a good peanut butter cookie! I’ve tried this recipe with all sorts of gluten free flours, oils, and sweeteners.  However, maple syrup is my favorite!  The choice of oil seems to make less of a difference.  I give a couple of options below.  If you opt for coconut oil, be sure it is melted.  Like butter, it solidifies at cooler temps and will seize up into little chunks when it meets a cold substance (like refrigerated maple syrup!).

Dry Ingredients:
1 cup sorghum flour (or brown rice flour)
1/2 teaspoon baking soda
1/2 heaping teaspoon kosher salt
1/4 teaspoon xanthan gum

Wet Ingredients:
1/2 cup sunflower seed butter
1/2 cup pure maple syrup (I used grade A, but I bet grade B would be even better)
3 tablespoons unrefined coconut oil (melted), olive oil, or organic canola oil
1 teaspoon vanilla

  • Preheat oven to 350 degrees F.  Line a sheet pan with parchment paper.
  • In a medium bowl, whisk together the dry ingredients.
  • In a large bowl, mix together the wet ingredients.  Add the dry mix to the wet mix and stir until evenly moistened.  Allow the dough to rest a minute or two.
  • Using a tablespoon, drop the dough onto the cookie sheet and give each mound a gentle press to barely flatten into disks.
  • Bake 9-11 minutes, depending on your cookie personality: soft vs crumbly.

Yield: About 1 dozen

Lemon Chia Seed Cake {gluten-free,vegan}

Lemon Chia Seed Bread {gluten-free, vegan}

I thought I’d share this new gluten-free, vegan quick bread I’ve been making a lot lately. Consider it a twist on the lemon poppy-seed sort. It swings a little more to the cake end of the spectrum than my other quick breads, but in a good way, with a light, springy texture and a tad extra sweetness. The lemon is subtle, just a teaspoon or so of zest. And chia seeds, while an excellent visual substitute for poppy seeds, play a structural role as an egg-replacer, too.

P1060822

A Super Seed
Here are a few cool facts: chia seeds boast more calcium ounce-for-ounce than a glass of milk (great news for the dairy-free!), are a concentrated source of omega-3 and omega-6 fatty acids, and provide complete protein all on their own (Vegans? Vegetarians? That’s for you.). Poppy seeds are cool and all, but chia seeds win my vote any day for their super-food bragging rights.

To read more about this super-seed and its fascinating history, check out Sarah’s post at My New Roots.

I’ve mentioned already that chia seeds stand in for the binding power of eggs in this recipe, but it is sparkling water that makes up for eggs’ leavening abilities. I find I am using sparkling water more often in my baking to give these arguably heavy gluten-free flours some lift and lightness.

Lemon Chia Seed Bread {gluten-free, vegan}

Also, I like to dust the pan with sugar instead of flour, which creates a wonderfully crunchy sugar crust around the edges, especially at either end.

LEMON CHIA SEED CAKE

Dry Ingredients:
1-2 tablespoons white sugar (for dusting the pan)
2/3 cup brown rice flour
1/3 cup millet flour
1/3 cup potato starch
1/4 cup tapioca starch
1 1/2 teaspoons baking powder
1/2 teaspoon xanthan gum (I used Bob’s Red Mill)
1/2 teaspoon Kosher salt
1 teaspoon lemon zest (about half of a lemon)

Wet Ingredients:
1 tablespoon chia seeds
3 tablespoons hot water
2 tablespoons unrefined coconut oil
3 tablespoons neutral/mild flavored oil like canola
3/4 cup turbinado sugar
3/4 teaspoon pure almond extract
3/4 teaspoon pure vanilla extract
2 teaspoons fresh lemon juice (about half of a lemon)
1/2 cup plus 2 tablespoons sparkling mineral water, like Perrier (sea level bakers may need closer to 3/4 cup)

  • Preheat oven to 350 degrees F. Oil a 9×5 loaf pan and sprinkle with 1-2 tablespoons of white sugar, turn the pan to coat, and tap to remove any excess sugar.
  • In a small bowl, whisk together the chia seeds and hot water. Set aside for 10 minutes to thicken.
  • In a medium bowl, whisk together the dry ingredients, beginning with the brown rice flour through the salt. Add the lemon zest to the mix with your fingers so as to break up any clumps of zest.
  • In the bowl of a stand mixer, beat the coconut oil, canola oil, and turbinado sugar. Add the chia seed gel and mix to incorporate. Add the almond and vanilla extract, along with the lemon juice, mix until fully incorporated. Alternately, add the dry flour mix and sparkling mineral water until the batter is just blended.
  • Pour batter into prepared pan and bake 45-50 minutes until the center is set and a toothpick inserted into the bread comes out clean. Allow bread to cool in pan for 10 minutes. Then remove from pan and allow to cool fully on a rack.

Old-Fashioned Chocolate Cake with Quinoa Flour {gluten-free, vegan}

It has been a very long while since I’ve posted anything here. Please excuse the dust. However, I have a wonderful reason for my time away…

Our sweet son, Cecil!

This time last year he was still growing in my belly. I was elated, engrossed, and understandably monomaniacal about it all. Hence, the reason for my absence around these parts.

Then, in early January, he arrived.  We’ve never known such love.

He’s almost eight months old now(!) and fantastic, such a delight. And this new role, the wonderful chaos of it all, has nearly become second nature. For me, that means there is time to not only make dessert, but occasionally take a photograph, as well.

So, what better way to celebrate and begin anew than with a cake?

This recipe has been a long time coming. I have been tweaking it for a couple of years, tinkering away with the combination of whole grain flours, the ratio of liquids, different sweeteners, etc. I think I finally have it dialed in.

First, I love this cake’s thrift and convenience. Since the ingredient list consists of pantry goods, you can make it on a whim, no dashing out to the store for some last-minute perishable. I like to think this is the kind of cake our great-grandmothers would have made, perhaps when times were lean, but there was still reason to celebrate.

You’ll find no butter, milk, or eggs, a rare feat for any cake. Instead we have just the right amount of vinegar, oil, and water, a wet slurry that when combined with a bit of baking soda creates some sort of miraculous leavening concoction. Aside from being vegan, the cake is gluten-free, too. I’d rather not dwell too long on what’s missing, though, because this is not a glass-is-half-empty kind of cake. It is, in a word, exemplary: moist, dense, super chocolaty, with a lovely crumb.

The use of quinoa flour adds an almost undetectable, nuanced compliment to the cocoa, not to mention a hefty nutritional boost. You just taste complexity. I’ve talked about this combination before: chocolate + quinoa flour.  It’s a real favorite of mine.

Please, do give it a try and let me know your thoughts. I think it might just become one of your favorite cakes, too.

Old-Fashioned Chocolate Cake with Quinoa Flour
Truth be told, we’ve been known to have a little sliver alongside our morning cup of joe…just an idea. Also, I offer a range for both the quantity of water and the baking soda. If you live at sea level you’ll likely need the higher range of each, or 1 cup of water and 1 teaspoon of baking soda. I live at an extremely high altitude so I almost always need less liquid and slightly less leavening. One last note, this batter, when immediately poured into your baking dish, is pretty thin and pourable. If you wait, the batter begins to thicken.

Dry mix:
1/2 c. quinoa flour
1/2 c. brown rice flour
1/3 c. potato starch
3 T. tapioca starch
1/3 c. cocoa powder
3/4 t. xanthan gum (a heaping 1/4 t. if using Bob’s Red Mill xanthan gum)
3/4 – 1 t. baking soda
1/2 t. salt

Wet mix:
1 c. turbinado sugar (or white sugar)
3/4 – 1 c. water
1/4 cup neutral-tasting oil like grape seed
1 T. apple cider vinegar (white vinegar works also)
1 1/2 t. GF real vanilla extract

  1. Preaheat your oven to 350 F.
  2. In a medium size bowl, whisk together the dry ingredients.
  3. In a larger bowl, whisk together the wet ingredients.  Let the wet mix sit for a moment to give the turbinado sugar a chance to dissolve. This is when I oil my pan.
  4. Add the dry mix to the wet mix and whisk until fully incorporated.
  5. Pour the batter into an 8″ round, oiled pan.
  6. Bake 25-35 minutes or until a toothpick comes out clean. Allow to cool for 10 minutes or so.